 how-to
Best Time of Day for Yacht Exterior Photography
Table of Contents
- Why Timing Matters for Yacht Exterior Photography
- Golden Hour: The Prime Lighting Window for Yacht Photography
- Blue Hour and Dusk: Creating Moody, Sophisticated Images
- How to Photograph a Boat During Challenging Midday Conditions
- Yacht Photography Tips for Managing Reflections and Glare
- Boat Photography Lighting: Mastering Camera Settings and Exposure
- Building Your Yacht Photography Shooting Schedule
- Frequently Asked Questions
Last Updated: October 10, 2026
Why Timing Matters for Yacht Exterior Photography
The quality of light shapes every shot you take. Golden hour, blue hour, and midday conditions each create entirely different moods and technical challenges. At Primo Yachts of Palm Beach, we understand that timing determines whether your yacht looks stunning or flat in photos.
When you photograph a boat, you're fighting reflections, glare, and the challenge of capturing a three-dimensional vessel on a two-dimensional screen. Light direction changes everything. A yacht photographed at noon under harsh sun looks washed out and loses detail.
Professional yacht photographers plan their sessions around the sun's position and intensity. This isn't optional for quality results, it's fundamental. The difference between mediocre boat photography and gallery-worthy images often comes down to one factor: when you pressed the shutter button.
Golden Hour: The Prime Lighting Window for Yacht Photography
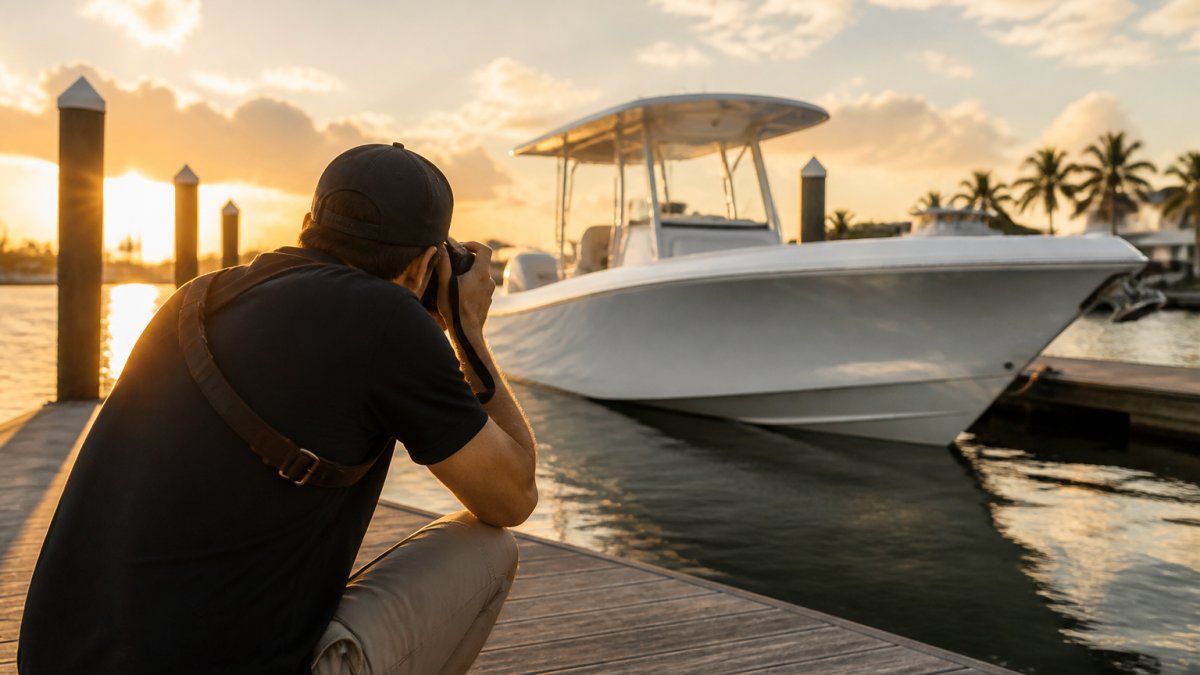
Golden hour is the 60-90 minutes after sunrise or before sunset when the sun sits low on the horizon. This is the most flattering light for yacht exterior photography. The warm, soft rays wrap around the hull and cabin, revealing texture and form without harsh shadows.
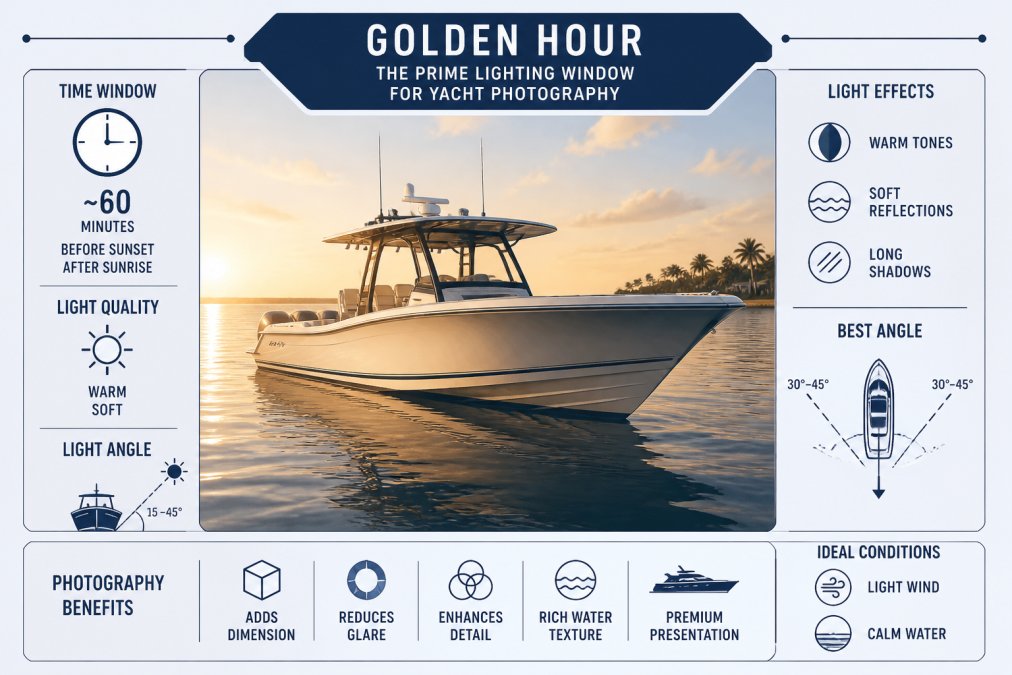
During golden hour, the light is diffused and warm. Colors appear richer. Shadows are long and directional, adding depth to your composition. The water reflects this warm glow, creating a cohesive scene where the vessel feels integrated with its environment.
Sunrise Photography vs. Sunset Photography
Sunrise golden hour offers cooler, slightly more muted tones. The air is often clearer with less haze. Fewer boats are on the water, so you can position your vessel without traffic interference.
Sunset golden hour delivers warmer, more saturated colors. The light has a golden-orange quality that makes hulls and brightwork pop. However, you're working against time, the sun sets fast, and you lose usable light quickly.
Both work equally well for yacht exterior photography. The choice depends on your schedule and the mood you want. Sunrise gives you calm water and peaceful conditions. Sunset provides richer color and more dramatic atmosphere.
Many photographers prefer sunset because the warm tones flatter the boat's finish. But sunrise has a practical advantage: you can shoot longer before the light becomes too harsh.
Blue Hour and Dusk: Creating Moody, Sophisticated Images
Blue hour occurs during twilight, roughly 20-40 minutes after sunset or before sunrise. The sun is below the horizon, but indirect light still illuminates the sky.
This is when yacht exterior photography becomes truly sophisticated. The sky deepens to rich navy or purple. The water mirrors this color.
Blue hour works best for luxury yachts with modern lighting systems. The contrast between artificial warm light and natural cool twilight creates a premium, editorial look.
The challenge with blue hour is exposure. Your camera needs to balance the darker sky with the boat's lit features. You'll need a tripod for stability and slower shutter speeds.
Dusk, the earlier part of twilight, offers a softer transition. The sky still holds some warmth near the horizon while the upper sky turns blue.
How to Photograph a Boat During Challenging Midday Conditions
Midday sun creates harsh, unflattering light. Shadows are short and dark. Glare bounces off the water and the boat's surfaces.
But midday shooting is sometimes unavoidable. Charter schedules, client availability, and weather windows force you to work with what you have.
If you must shoot at midday, position the boat strategically. Place the sun behind or to the side of the vessel, not directly overhead.
Use polarizing filters to cut reflections and glare. Increase your shutter speed and reduce ISO to manage the bright light.
Look for shade. Shoot the boat's shaded side or position it near land features that block direct sun.
Consider shooting video or action footage at midday instead of static exterior shots. Movement and narrative distract from poor lighting.
Yacht Photography Tips for Managing Reflections and Glare
Water is a mirror. The brighter the sun, the more intense the reflections. Glare washes out detail and creates blown-out areas in your image.
Polarized filters are essential for yacht exterior photography. They cut reflections by up to 50% and reduce glare significantly. A circular polarizing filter screws onto your lens and rotates to control the effect. This single tool transforms midday and challenging-light shooting.
Position yourself so the sun is at an angle, not directly behind you. If the sun is at your back, you're shooting into reflections. Angle yourself 45-90 degrees from the sun's direction for cleaner water reflections.
Polarized Light and Water Reflections
Polarized light bounces off water at specific angles. When light reflects off a horizontal surface like calm water, it becomes polarized. A polarizing filter blocks this polarized light, revealing the water's true color and any underwater features.
For boat photography, this means the water appears deeper, darker, and more defined. The yacht stands out against the water rather than disappearing into glare. The effect is dramatic, glare vanishes and detail emerges.
Polarizing filters work best when the sun is at 30-60 degrees from your shooting angle. When the sun is directly overhead or directly behind you, the effect diminishes.
Use a high-quality polarizing filter. Cheap filters degrade image sharpness and color accuracy. Invest in a multi-coated circular polarizing filter from a reputable manufacturer.
Vessel Angle and Sun Position Strategy
The angle between the boat, the sun, and your camera position determines light quality. This is where yacht photography gets technical.
Position the sun to the side of the vessel for three-dimensional lighting. Side lighting creates shadows that reveal the boat's shape and form.
Avoid shooting with the sun directly behind the boat.
Avoid shooting with the sun in front of you. You'll get lens flare, glare, and blown-out highlights. Your camera struggles to expose correctly.
The ideal position is 45-90 degrees from the sun's direction. This angle provides directional light that sculpts the yacht's form.
If you're photographing from a chase boat, communicate with the captain. Ask them to position the vessel so the sun creates the angle you need.
Boat Photography Lighting: Mastering Camera Settings and Exposure
Light quality and camera settings work together. You can't fix poor settings with perfect light, and you can't overcome bad settings with ideal lighting.
Shutter Speed, Aperture, and ISO for Different Light Conditions
Golden hour light is soft and warm, but it's not bright. You'll need slower shutter speeds, typically 1/500 to 1/1000 depending on your aperture and ISO.
Use aperture between f/4 and f/8 for yacht exterior photography.
ISO should stay as low as possible. In golden hour, ISO 200-800 is typical. In blue hour, you may need ISO 1600-3200.
Midday shooting requires different settings. The light is bright, so you can use fast shutter speeds (1/2000 or faster) even at low ISO (100-400).
Blue hour demands slow shutter speeds and higher ISO. You might shoot at 1/60 with f/2.8 and ISO 1600. Use a tripod for stability.
Shoot in RAW format whenever possible. RAW files contain more color and tonal information than JPEG.
Tripod Stability and Shooting from a Moving Vessel
If you're photographing from a moving boat, camera shake is your enemy. Even slight movement creates blur.
Use a tripod rated for your camera and lens weight. Mount it securely to the boat's deck or rail. Brace it against movement.
If the boat is moving, use faster shutter speeds to compensate. A moving platform requires 1/1000 or faster to eliminate motion blur.
Consider using image stabilization technology. Many modern lenses and cameras include optical or electronic stabilization. Enable it when shooting handheld from a moving vessel.
For stationary shots, use a remote shutter release or the camera's self-timer. This eliminates the vibration from pressing the shutter button.
Practice your technique. Brace yourself against the boat's structure. Hold your camera steady. Use proper breathing, exhale before pressing the shutter to minimize movement.
Building Your Yacht Photography Shooting Schedule
Professional yacht exterior photography requires planning. You can't show up at random times and expect great results.
Create a shot list before each session. Identify which angles and details matter. Plan which light conditions suit each shot. Golden hour for beauty shots. Blue hour for dramatic, moody images. Daytime for action and lifestyle photography.
Weather, Season, and Location Adjustments
Weather affects light quality dramatically. Overcast skies diffuse light evenly but reduce contrast. This works well for detail shots but lacks the drama of clear-sky photography.
Wind creates water texture. Calm water reflects light cleanly. Rough water breaks reflections into patterns. Both can work, choose based on the mood you want.
Season changes the sun's angle and intensity. In summer, the sun is high and intense. Golden hour is shorter. In winter, the sun is lower and softer. Golden hour lasts longer and provides more flattering angles.
Location matters. Shooting on open water differs from shooting in a marina. Marinas offer protection from wind but may include distracting background elements. Open water provides clean backgrounds but requires more boat control.
Planning Multiple Sessions for Comprehensive Coverage
One session rarely captures everything. Schedule multiple shoots to cover different times of day and lighting conditions.
First session: Golden hour for primary beauty shots. Capture the boat's best angles in flattering warm light.
Second session: Blue hour for sophisticated, editorial images. Emphasize lighting and mood.
Third session: Daytime for action, lifestyle, and detail photography. Capture the boat in use.
This approach gives you a complete portfolio of yacht exterior photography covering different moods and purposes. Marketing materials benefit from this variety. Different images suit different contexts.
Plan sessions 2-3 weeks apart if possible. This spreads your shooting and allows time to review images and adjust your approach.
Timing transforms yacht exterior photography from ordinary to exceptional.
At Primo Yachts of Palm Beach, we understand these principles. When you're ready to showcase your vessel with photography that captures its true value, our specialist approach ensures your boat gets the visual presentation it deserves. Learn more about professional yacht marketing and presentation
Frequently Asked Questions
What time of day is best for yacht exterior photography?
Golden hour, the first hour after sunrise or the final hour before sunset, delivers the most flattering warm, soft light for yacht exterior photography. During these windows, directional light creates depth and dimension without harsh shadows. Blue hour (dusk and early twilight) offers moody, sophisticated tones ideal for lifestyle shots. Midday sun creates glare and blown-out reflections off water and the hull, making it the least ideal time unless you use specific techniques to manage exposure and reflections.
How do you avoid harsh reflections when photographing a yacht?
Position the vessel so the sun is behind or to the side of the boat rather than reflecting directly off the hull and water. Use a polarizing filter to reduce glare from reflective surfaces. Shoot during golden hour or blue hour when light is naturally softer and less polarized. Expose for the highlights (the bright hull and water) rather than shadows to prevent blown-out reflections. On reflective boats, even a slight angle change relative to the sun can eliminate problematic glare that dominates the frame.
Is golden hour the best time to photograph a yacht?
Golden hour is the most versatile and forgiving time for yacht exterior photography because the warm, directional light flatters the vessel's lines, creates natural shadows that add depth, and produces skin tones that look healthy in lifestyle shots. However, it's not the only effective window. Blue hour offers a completely different aesthetic, cool, moody tones and reflections on calm water, that works beautifully for sophisticated, lifestyle-focused images. The best time depends on your specific goals: choose golden hour for warm, detail-rich exterior shots and blue hour for atmospheric, evening-oriented imagery.
Can you take good yacht photos at midday?
Midday shooting is challenging because the sun is high and harsh, creating blown-out highlights on the hull and intense glare off the water. However, you can succeed with overcast conditions, which diffuse harsh light and reduce reflections, or by positioning the vessel to minimize direct sun reflection. Use fast shutter speeds and lower ISO to manage exposure, and expose for the highlights rather than the shadows. For best results, avoid shooting directly into the sun or with the sun creating a direct reflection off the hull. Midday works better for interior photography or detail shots than full exterior coverage.